Media Files
With the exception of the built-in sources which can be directly accessed by a layer, most media files you work with will need to be imported into a project before they can be played on a layer.
Pages and Clips
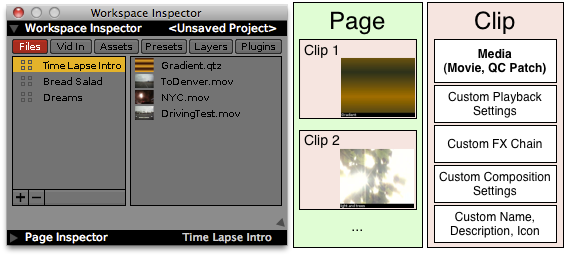
Loaded media files in VDMX are organized on pages. Each page can hold any number of clips and a project can contain any number of pages. A list of the current pages in a project can be found on the left sidebar of a media bin plugin and in the Files section of the Workspace Inspector.
Each clip is a wrapper for the media that it represents as well as any custom VDMX specific settings to be used when the file is playing on a layer.
Adding Files to a Project
File Browser
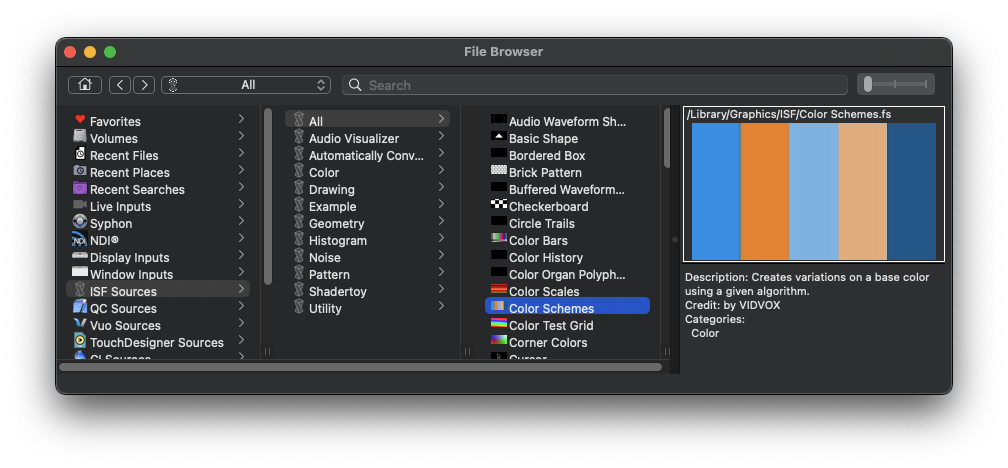
VDMX has its own file browser which can be used to navigate and search for media on your computer that can be played back. Local hard drives, stored favorites, recent places and built-in sources such as live inputs and Syphon sources can be accessed here.
The available search field can be used to perform Spotlight searches of your local drives. Built-in sources will also be included in the results.
The file browser can be opened from the Window menu under Browse / Import Media. Many of the options in the browser can also be accessed directly from the right+click contextual menu in the media bin.
Disk Based Files
To add files that are on a local hard drive to your project simply drag from a window in the Finder or the built-in file browser to a page view or onto a list of pages. Files can also be loaded using a standard Mac OS open dialog window by choosing "Import Media" from the File menu (⌘I).
When possible VDMX will try to automatically create new pages for imported folders, except when directly inserting onto a specific page. New pages can also be manually created and deleted using the + / - buttons.
Built-In Sources
In addition to traditional disk-based media like movies and image files VDMX can generate and receive video frames using a variety of different formats.
These sources can be either directly accessed by layers in the Layer Source window with their default settings or added to pages as clips that can be triggered like disk based media files.
Supported types include: * CoreImage generators
- FreeFrame and FreeFrameGL generators
- Live Inputs - Web-cams, DV, HD digitizers
- Syphon - Images provided from other applications over the Syphon protocol
- Window Inputs - The contents of any window in a visible application * Web - Display the content from any website accessed over http://
- Layers - Uses the contents of any layer or group in VDMX, before or after FX are applied.
Organizing Files within a Project
Once files are added to pages, you may want to change their order or remove them from a project.
*Moving Clips - Clips can be moved simply be selecting them in a media bin (shift+click) or list view and dragging them to a new location in VDMX. While dragging clips an insertion marker will appear when mousing over a page that can accept the drop.
*Duplicating Clips - To create a copy of a clip use the same instructions as for moving clips but also hold down on the option (⌥) key. All of the settings for the duplicated clips (such as in/out points) will be copied as well.
*Deleting Clips - To remove clips from a page, select them and press the delete key. A dialog box will appear asking to confirm the operation.
*Exporting Clips and Pages - Right+click on one or more clips or pages and choose the export option to save a file collection that includes all of the settings to disk. These collections can be loaded like any other disk based file or folder.
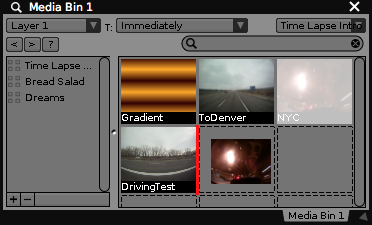
Triggering/Playing Back Files
See the media bin plugin for more information.
Inspecting/Modifying Files
In the first tab of the Workspace Inspector you'll find the File Inspector which can be used to load, manage and edit the properties of pages and media clips in your current project.
In the top-most section of the File Inspector clicking on a page in the left column will reveal its contents on the right. From here clips can be re-ordered or moved to another page by dragging to the desired location.
Page Settings
By default, the contents of a page are set up manually by loading files from the Finder or media browser. In the page inspector you can specify a directory, such as a folder on disk, with which the page will keep in sync with. When active the page will attempt to create a new clip for each item in the directory.
Additionally you can set a filter for a specific file type, such as movies or still images, and whether or not VDMX should automatically delete clips that are removed from the directory.
Clip Settings
When one or more clips are selected in the Workspace Inspector the clip sub-inspector will appear.
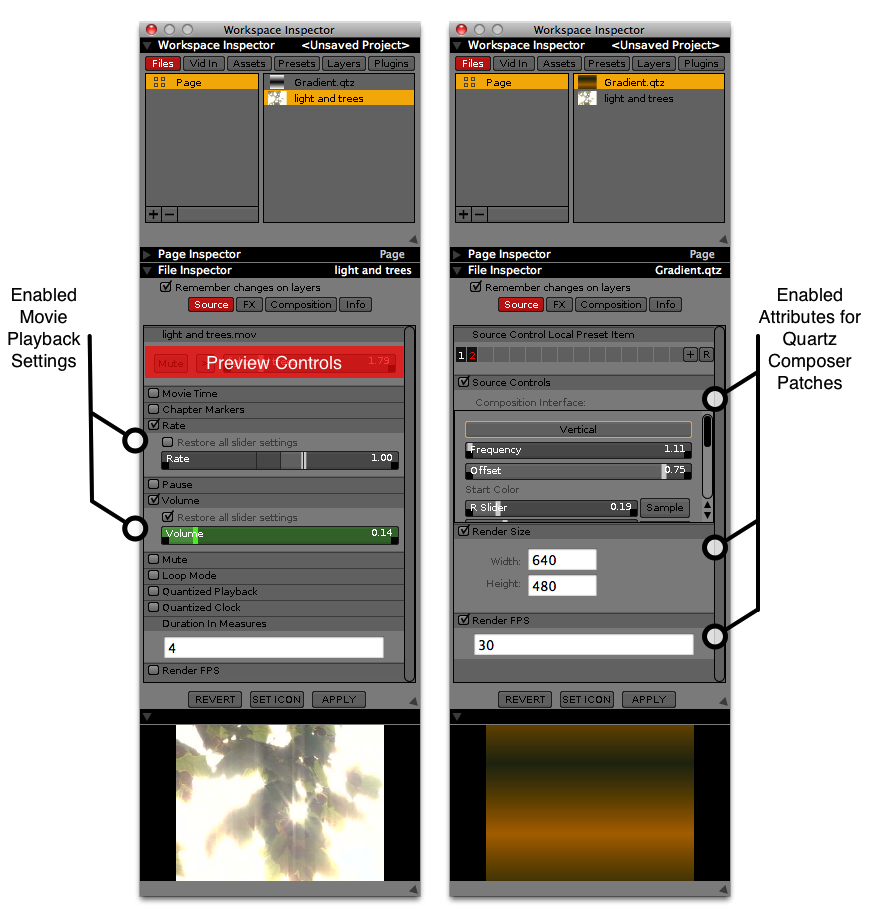
By default, in most cases clips will use the current source controls, FX, and composition settings of the layer it is playing on. Using the file inspector you can specify which of these settings should be overridden when the clip is triggered.
To activate a custom attribute setting for a clip, click on the toggle next to the name of the attribute in the list.
In some cases additional options for the attribute may appear.
For each listed attribute is a toggle for whether or not the clip should override or use the current layer setting. When an attribute is enabled for a clip, additional options may appear.
When a single clip is inspected, an additional sub-inspector will appear showing a preview of the output from the clip with the specified settings.
*Clip Name - The name of a clip can be changed by clicking on its name in the list view in the top file inspector. After a moment the text field will become editable. *Source Controls Settings - The available source attributes for a clip will vary depending on the type of file. **For generative sources such as CoreImage, Quartz Composer patches, text, FreeFrame, Flash and Web you can specify the resolution and fps of the clip, as well as the settings for any custom inputs that the patch / plugin has defined. **For fixed sized sources, such as movies, live inputs, and video receivers, each of the built-in controls such as rate and volume can be individually overridden, as well as the render fps, but not the rendering resolution. **When selecting multiple clips, only the attributes that are common to the selection will be editable from the inspector. *Custom FX Chain - Create a custom FX chain that is loaded whenever the clip is triggered on to a layer. *Composition Settings - For each clip you can override the following layer composition controls. The attribute picker lets you specify whether to override just the value, or all slider / button / pop-up menu settings. OpacityBlend / Composition ModeSize ModePosition ModeX PositionY PositionWidthHeightCustom QC Comp Mode settings (when applicable) *Setting a Custom Icon - When a single clip is being inspected an additional sub-inspector will appear to show a preview of the media along with any custom applied FX. The current frame of the preview can be stored as the icon for the clip by clicking the "SET ICON" button in the clip inspector.
Relinking Missing Media
When a project is opened VDMX will attempt to relocate any media files that are referenced by your clips. If the media associated with a clip has been moved, renamed or removed from the system, you may need to point the clip to the new file before it can be played back.
Clips whose media file is unavailable are indicated by a special "missing" icon in the media bin.
You can either relink clips immediately after a project is finished loaded or at any time later by choosing the Relink Missing Media or Fast Relinking options from the Workspace menu.
Manual Relinking
Using the "Relink Missing Media" panel, accessed from the Workspace menu, you can view a list of all clips that are in the missing media state and connect them to different files.
To relink a single clip select it in the list and click the **Find * button. For disk based files VDMX will perform a search to attempt to locate the original media for you. If no matches are found, or the list of results does not include the file you are looking for, click the 'Browse' button to reveal a standard Mac OS open file dialog window to pick a specific file to relink with, or click 'Skip' to close the window.
Using the Find All button will go through the same step for each missing clip.
If the Automatically Resolve Conflicts option is active VDMX will search the directories of any successfully relinked files for other missing files and automatically reconnect them if found.
Fast Relinking
Rather than manually browsing / searching for missing media most of the time VDMX can automatically use Spotlight to locate the files in the background without any additional user interaction. If more than one match is found VDMX may make a "best guess" based on stored meta-data about the file.
This feature can be activated from either from the missing file dialog window or using the Fast Relinking option from the Workspace menu.